A Lambda bot that responds to GitHub pushes and deploys to S3
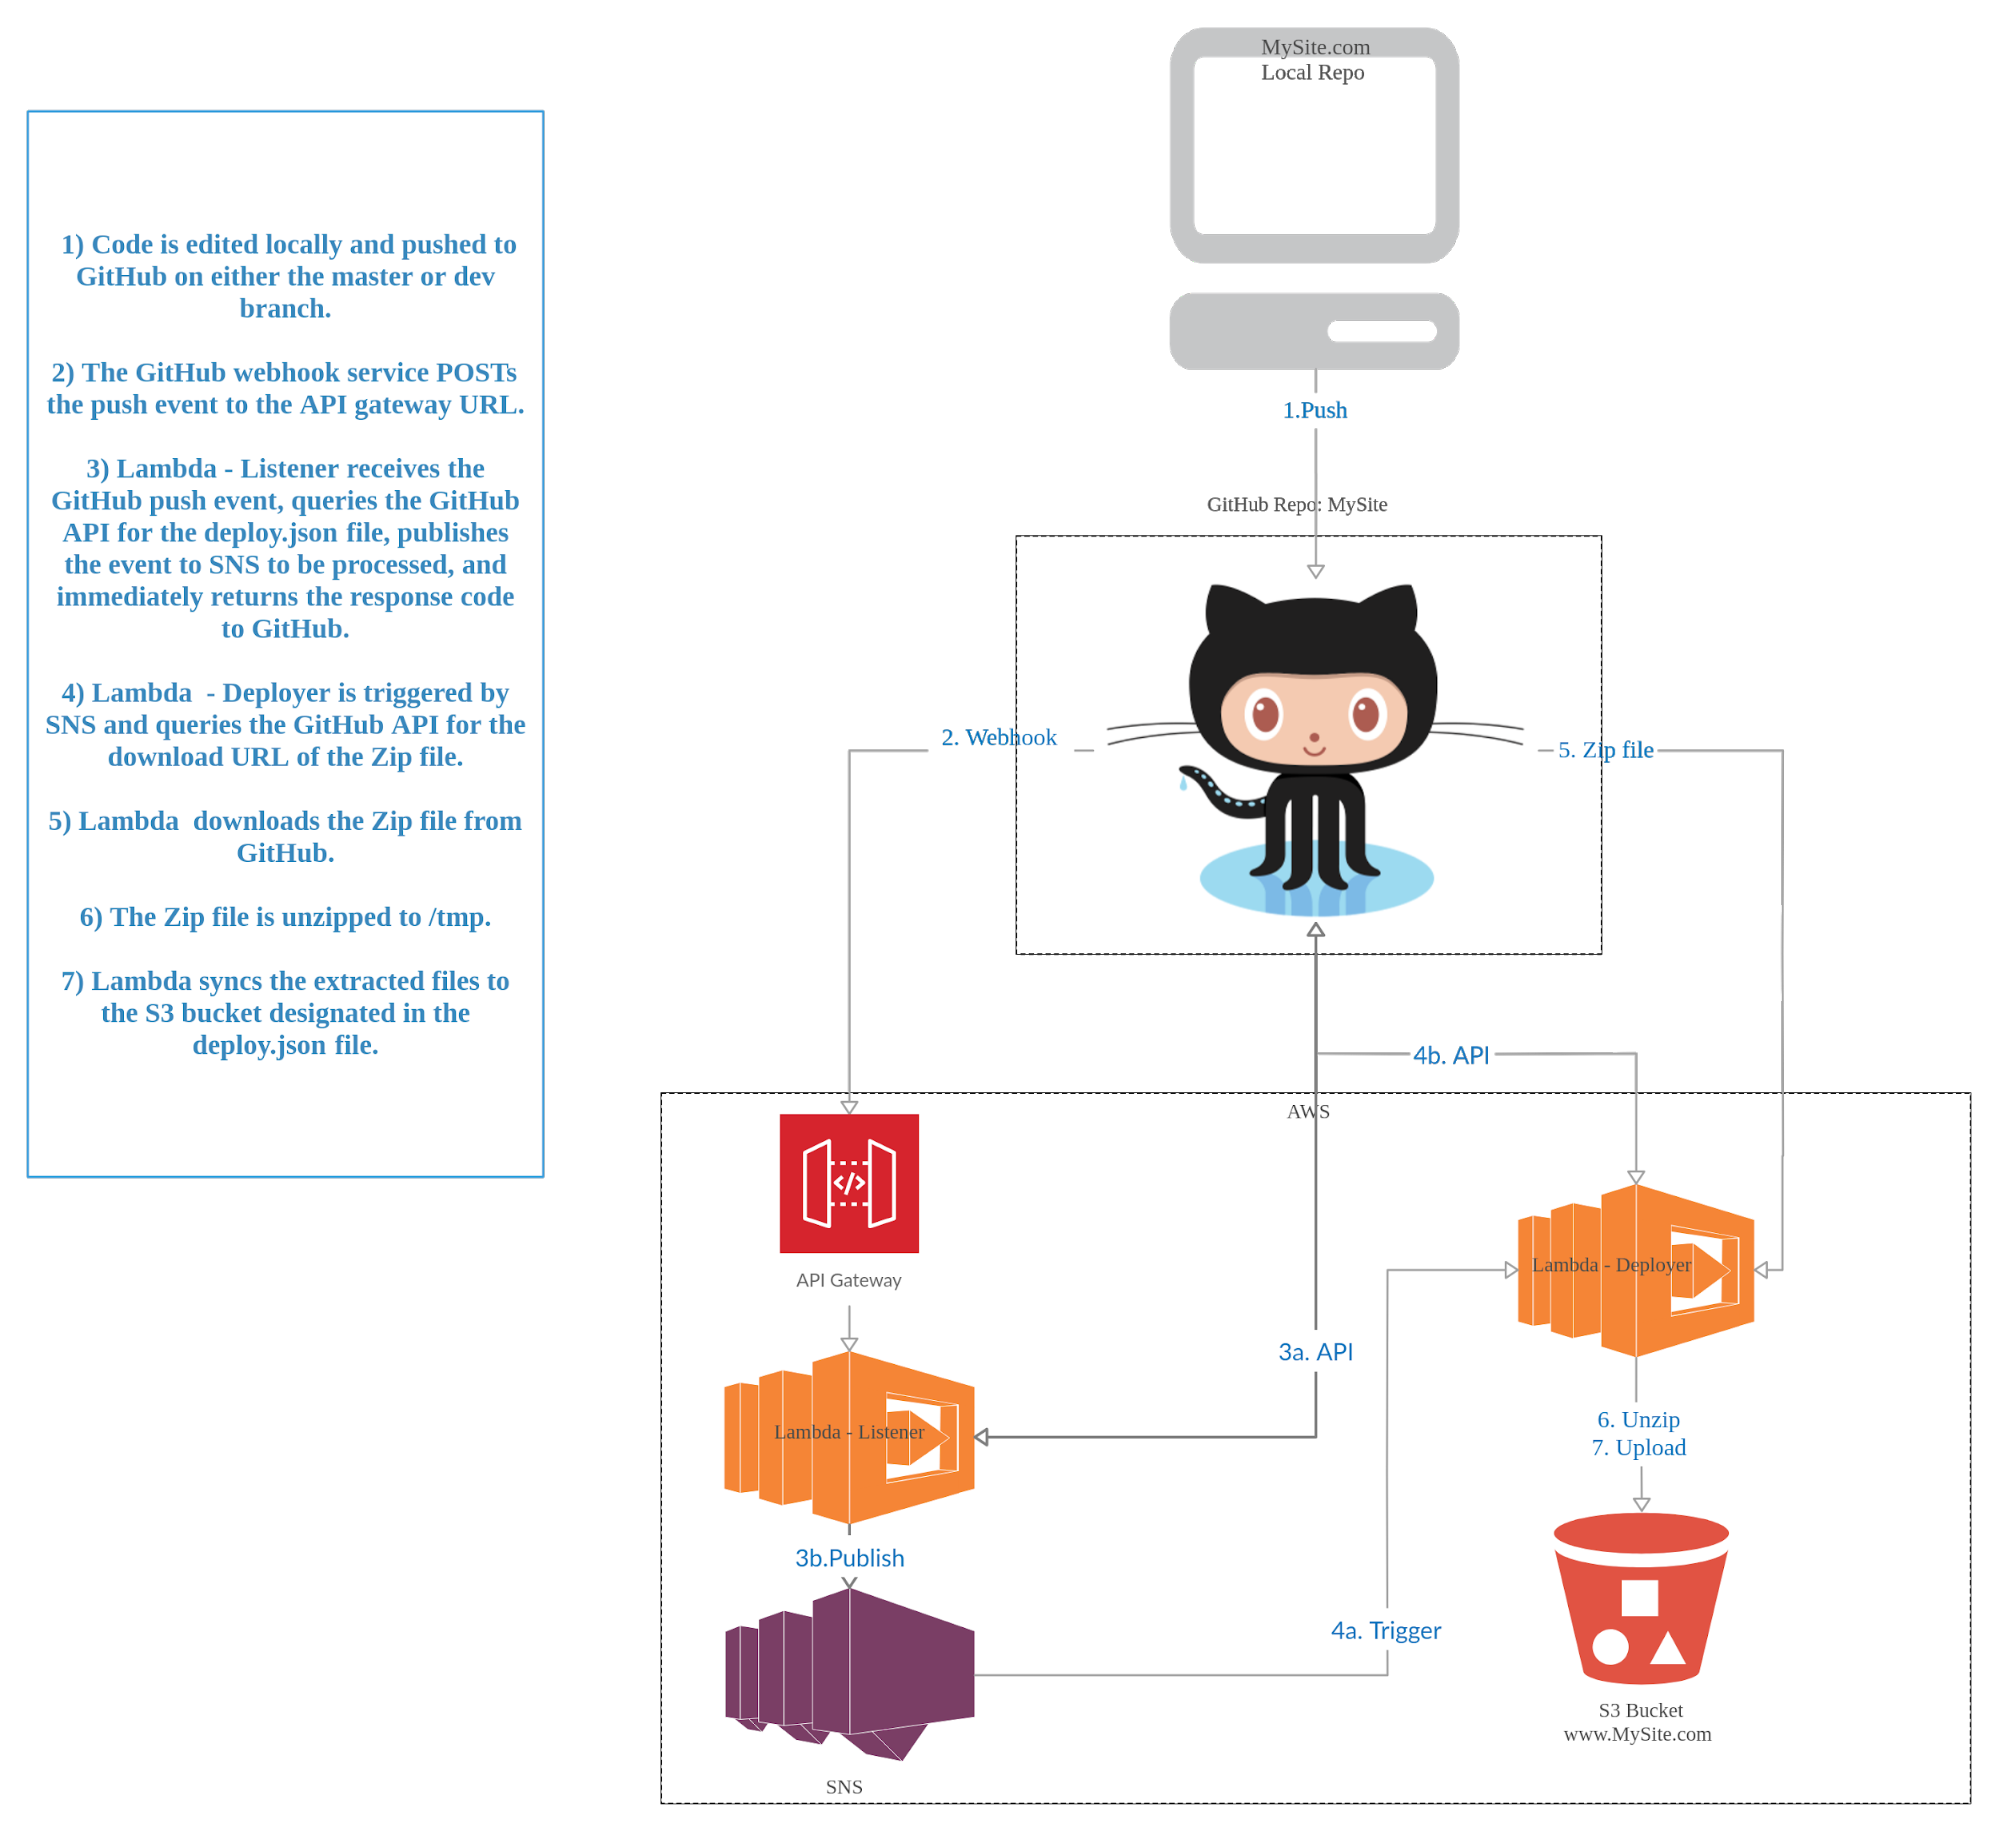
This walkthrough automates deployment to an S3 website triggered by pushes to a GitHub repository. The following steps will create the necessary S3 bucket, GitHub webhook, and Lambda application. This article assumes that you already have a GitHub account and repo, that you are proficient in using git, branches, and pushing to a remote repository, that you have AWS-CLI installed and configured, and that you have the Serverless.js framework installed and configured for your AWS account(s).
Step 1: Create Two S3 buckets and configure for web hosting
If you already have S3 buckets configured for web hosting you can skip to Step 2. However I would recommend testing this on a non-production website first. I recommend creating a primary bucket for pushes to the 'master' branch and a second dev bucket for pushes to the 'dev' branch. The steps below are only the very basic necessary to create an S3 bucket for web hosting, there are far more configuration options available at: http://docs.aws.amazon.com/gettingstarted/latest/swh/website-hosting-intro.html
NOTE:: it should go without saying, but please replace www.mysite.com below with your domain unless you actually own mysite.com.
{ "Version": "2012-10-17", "Statement": [ { "Sid": "PublicReadGetObject", "Effect": "Allow", "Principal": "*", "Action": "s3:GetObject", "Resource": "arn:aws:s3:::www.mysite.com/*" } ] } |
Step 2: Create deploy.json file and assign deploy targets
The GitHubtoS3 lambda bot will search your repo for a deploy.json file in order to know how and where to deploy your website. This file specifies the type of deployment “S3”, as well as the bucket names for pushes to the “master” and “dev” branches. Again, please replace www.mysite.com and dev.mysite.com below with your actual bucket names.
{ "deploy": { "type": "S3", "target": { "master": "www.mysite.com", "dev": "dev.mysite.com" } } } |
Step 3: Create GitHub access token and Webhook Secret
You can create access tokens for your own account, but then everything the Lambda function does will appear as if you yourself did it. This may be fine for a repo that only you contribute to, but for a larger team it makes sense to create a new GitHub account for your bot to authenticate as.
Step 4: Clone the GitHubtoS3 repo and configure
Clone or download the GitHubtoS3 repo to your local environment to configure your aws-cli profiles, personal access token, and S3 bucket names. The example config file provides examples for 2 separate AWS-CLI accounts configured but more can be added or removed as necessary. It also contains examples for 3 S3 buckets per AWS account, again more can be added or removed as needed.
{ "aws-profile1": { "github_personal_access_token": "SuperSecretPersonalAccessToken1", "github_webhook_secret": "UseTheSameWebhookSecretForAllReposDeployedToThisAWSAcct", "s3_targets": [ "arn:aws:s3:::TheBucketYouAreDeployingTo", "arn:aws:s3:::TheNextBucketYouAreDeployingTo", "arn:aws:s3:::JustListThemAllHere" ] }, "aws-profile2": { "github_personal_access_token": "SuperSecretPersonalAccessToken2", "github_webhook_secret": "UseTheSameWebhookSecretForAllReposDeployedToThisAWSAcct", "s3_targets": [ "arn:aws:s3:::TheBucketYouAreDeployingTo", "arn:aws:s3:::TheNextBucketYouAreDeployingTo", "arn:aws:s3:::JustListThemAllHere" ] } } |
Step 5: Install the necessary NPM modules
The GitHubtoS3 application depends on a number of NPM modules, those aren't included within this repo and will need to be installed.
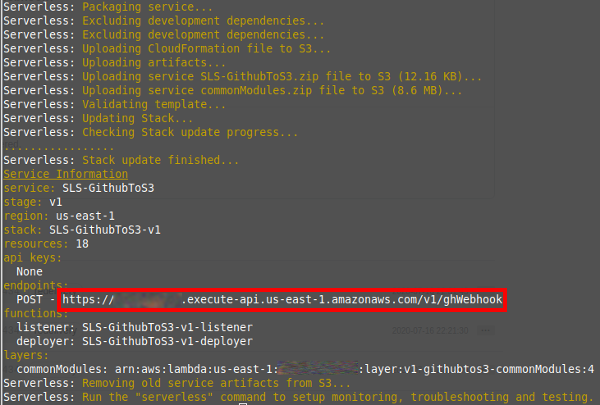
Step 6: Deploy GitHubtoS3
GitHubtoS3 should now be configured and ready to be deployed to your AWS account using Serverless.js. This will create the two lambda functions, the SNS topic, and the API Gateway endpoint that the GitHub webhook will use.
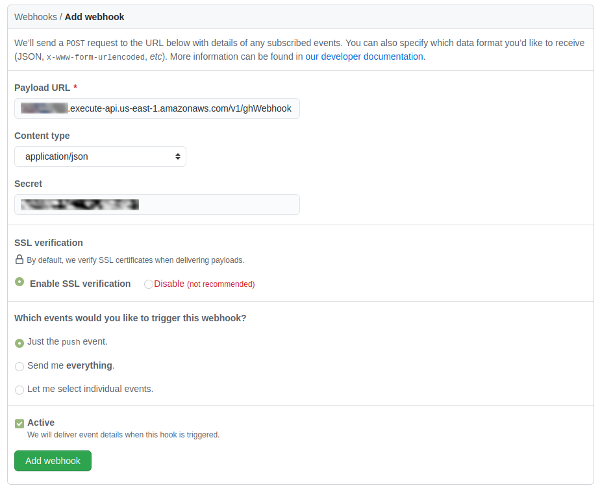
Step 7: Create the GitHub webhook
GitHub webhooks will trigger an external service in response to certain events. In this case "Push" events will be published to the API Gateway endpoint created in the previous step. You will also need the GitHub webhook secret you created in Step 4. If you configure multiple repos to use GitHubtoS3 use the same GitHub webhook secret for all of them. Make sure each of these repos contains a deploy.json file created in Step 2.
The following links provide more information for GitHub webhooks:
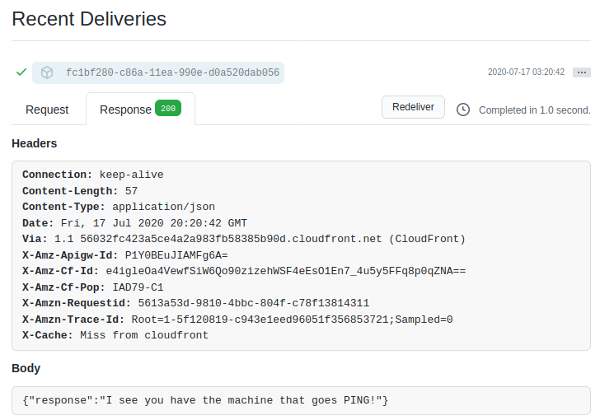
Step 8: Test the Setup
That's it, everything should now be functioning. You can test it by making a change to your repo and pushing to either the master or dev branches to trigger the webhook. You can monitor the progress in the following places:
Credits:
By no means did I come up with all of this by myself. I drew heavy inspiration (and code) from the links below::
Dynamic GitHub Actions with AWS Lambda
https://aws.amazon.com/blogs/compute/dynamic-github-actions-with-aws-lambda/
JavaScript GitHub API for Node.JS
http://mikedeboer.github.io/node-github/
S3 Static Website Hosting:
http://docs.aws.amazon.com/gettingstarted/latest/swh/website-hosting-intro.html
The changes in V3.0.x which moved the trigger for this function from GitHub's SNS service to an API Gateway webhook drew heavy inspiration from:
https://serverless.com/examples/aws-node-github-webhook-listener/